
Workflows for Online Booking
Are you prepared to elevate your business automation to new heights? Embrace the efficiency of workflows for your online booking calendars. By integrating a workflow into your booking system, you can make the entire booking process even more seamless, benefiting both your clients and yourself. Gone are the days of manual email reminders before or after sessions; with Iris’ automated workflows, these tasks are effortlessly taken care of!
With workflows, you not only save precious time but also significantly reduce the occurrence of errors in your business operations. Moreover, your clients will be well-informed at every step, ensuring an exceptional customer experience throughout their journey with you.
Interested in creating and attaching a workflow to your booking calendars? Check out the simple steps below to get started!
Start Your 14 Day Free Trial
No credit card required!
How to Create a Workflow
There is no right or wrong way to set up your workflow. Your workflow’s content will be shaped by your business preferences, which may vary depending on the session type. First and foremost, you need to create your workflow before incorporating automation into your booking calendar.
Workflows consist of two essential components: automated emails and to-do tasks. To get started, it’s essential to have pre-designed email templates ready. These templates may include confirmation emails, prep/style instructions, session reminders, and post-session follow-up emails. On the other hand, the to-do tasks involve your actions, such as image culling, editing, and gallery delivery.
To create your workflow within Iris, follow these steps: Navigate to My Settings > Settings > Workflows. You have the option to either craft a new workflow or edit an existing one. For a new workflow, simply click on the “Create Workflow” button located at the top right corner.
From here, you can gradually add the following items to your workflow:
Here’s how to proceed:
Send The Email:
When you select this item, this will give you the option to select from any of your email templates. This step in the workflow will automatically send your selected email template at the time you have it scheduled for in the workflow.
Create A To-Do:
When you select this item, you’ll have an option to type into a box. You can type things like “cull images”, “confirm session date/time and location”, or “edit images” as a few examples. These will be tasks that you can check off on your To-Do list (found in the client’s profile, dashboard, or the To-Do’s tab across the top of Iris)
Edit and Send Email:
When you select this item, again you will see the option to select from your email templates. Instead of this email automatically sending when scheduled, you’ll receive an email notification as a reminder that it is time to edit the email before sending. You’ll be prompted to log into your account (or if you simply login on the date/time it is scheduled for), then you will see a pop up with the option to edit the body of that email template further in case you would like to customize more before sending to the client. You also have the option to cancel it from sending or have it remind you one day later if you aren’t ready to send it yet.
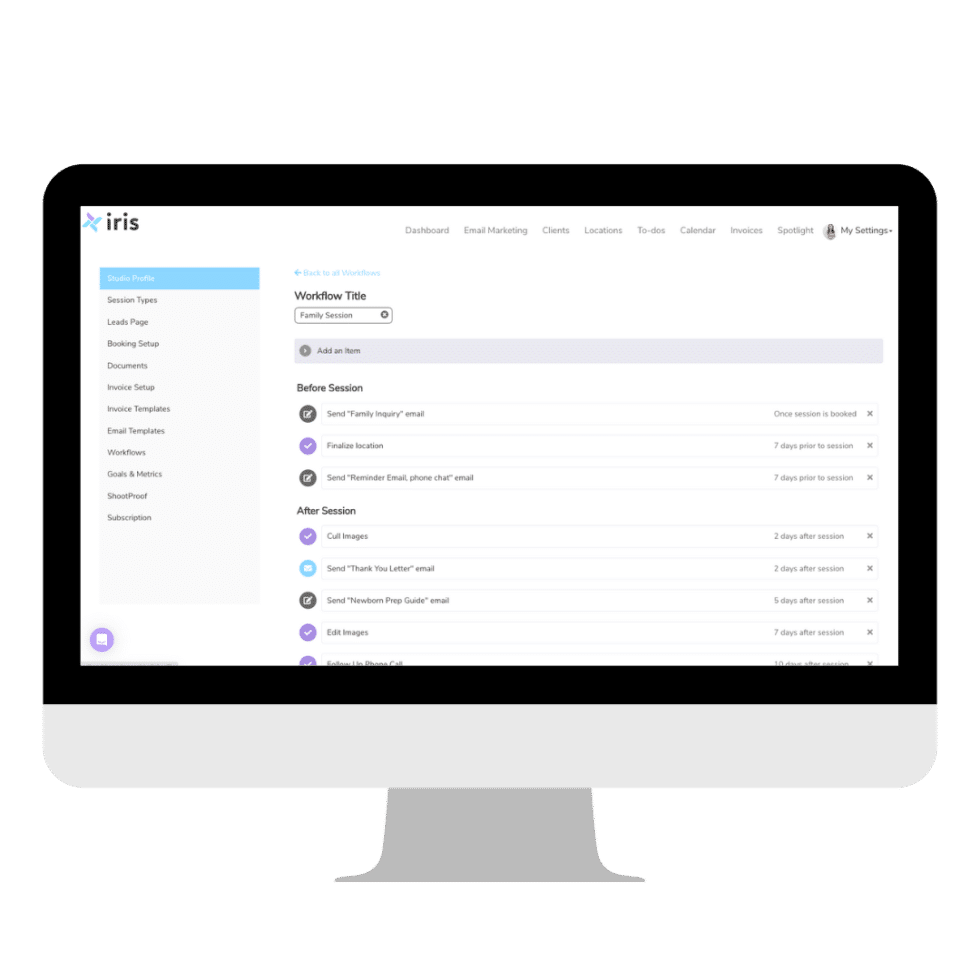
Workflow items can be scheduled by using any of the following options:
Once a Session is Booked:
This will set your workflow step to take place immediately after a session is booked (from your calendar or manually adding their session as a new event). So, if you have a send email scheduled for once session is booked – that email will send automatically after the client books or you add the event as a session and have this workflow assigned.
Before / After Session:
This will allow you to schedule your workflow items a number of days/weeks/months/years before or after the session date. For example, you may want to schedule a reminder email to send 3 days before the session.
After Session is Booked:
This option uses the date that the session was booked or added to your calendar as an event/session and will send after this date. You can schedule an email or to-do for a number of days/weeks/months/years after the session has been booked (or added to your calendar).
Pro Tip:
Include questionnaires in your workflow process to gather helpful information about your clients before your session. This will help you feel more prepared for your session and also create a customized experience for your clients! You can even include a feedback questionnaire to send automatically after the session to learn what your business does well and what to improve on!
How to Attach Your Workflow to Booking Calendars
Once you have your workflow built, you can then begin attaching it to your booking calendars! Navigate to your Booking Setup in Iris. You can either create a new booking calendar or edit an existing one.
When creating or editing a booking calendar, you’ll see a page for the Calendar Info. Think of this like your preferences for this particular booking calendar. You’ll find an option to select and assign which workflow you’d like to be associated with this calendar and sessions that get booked from it.
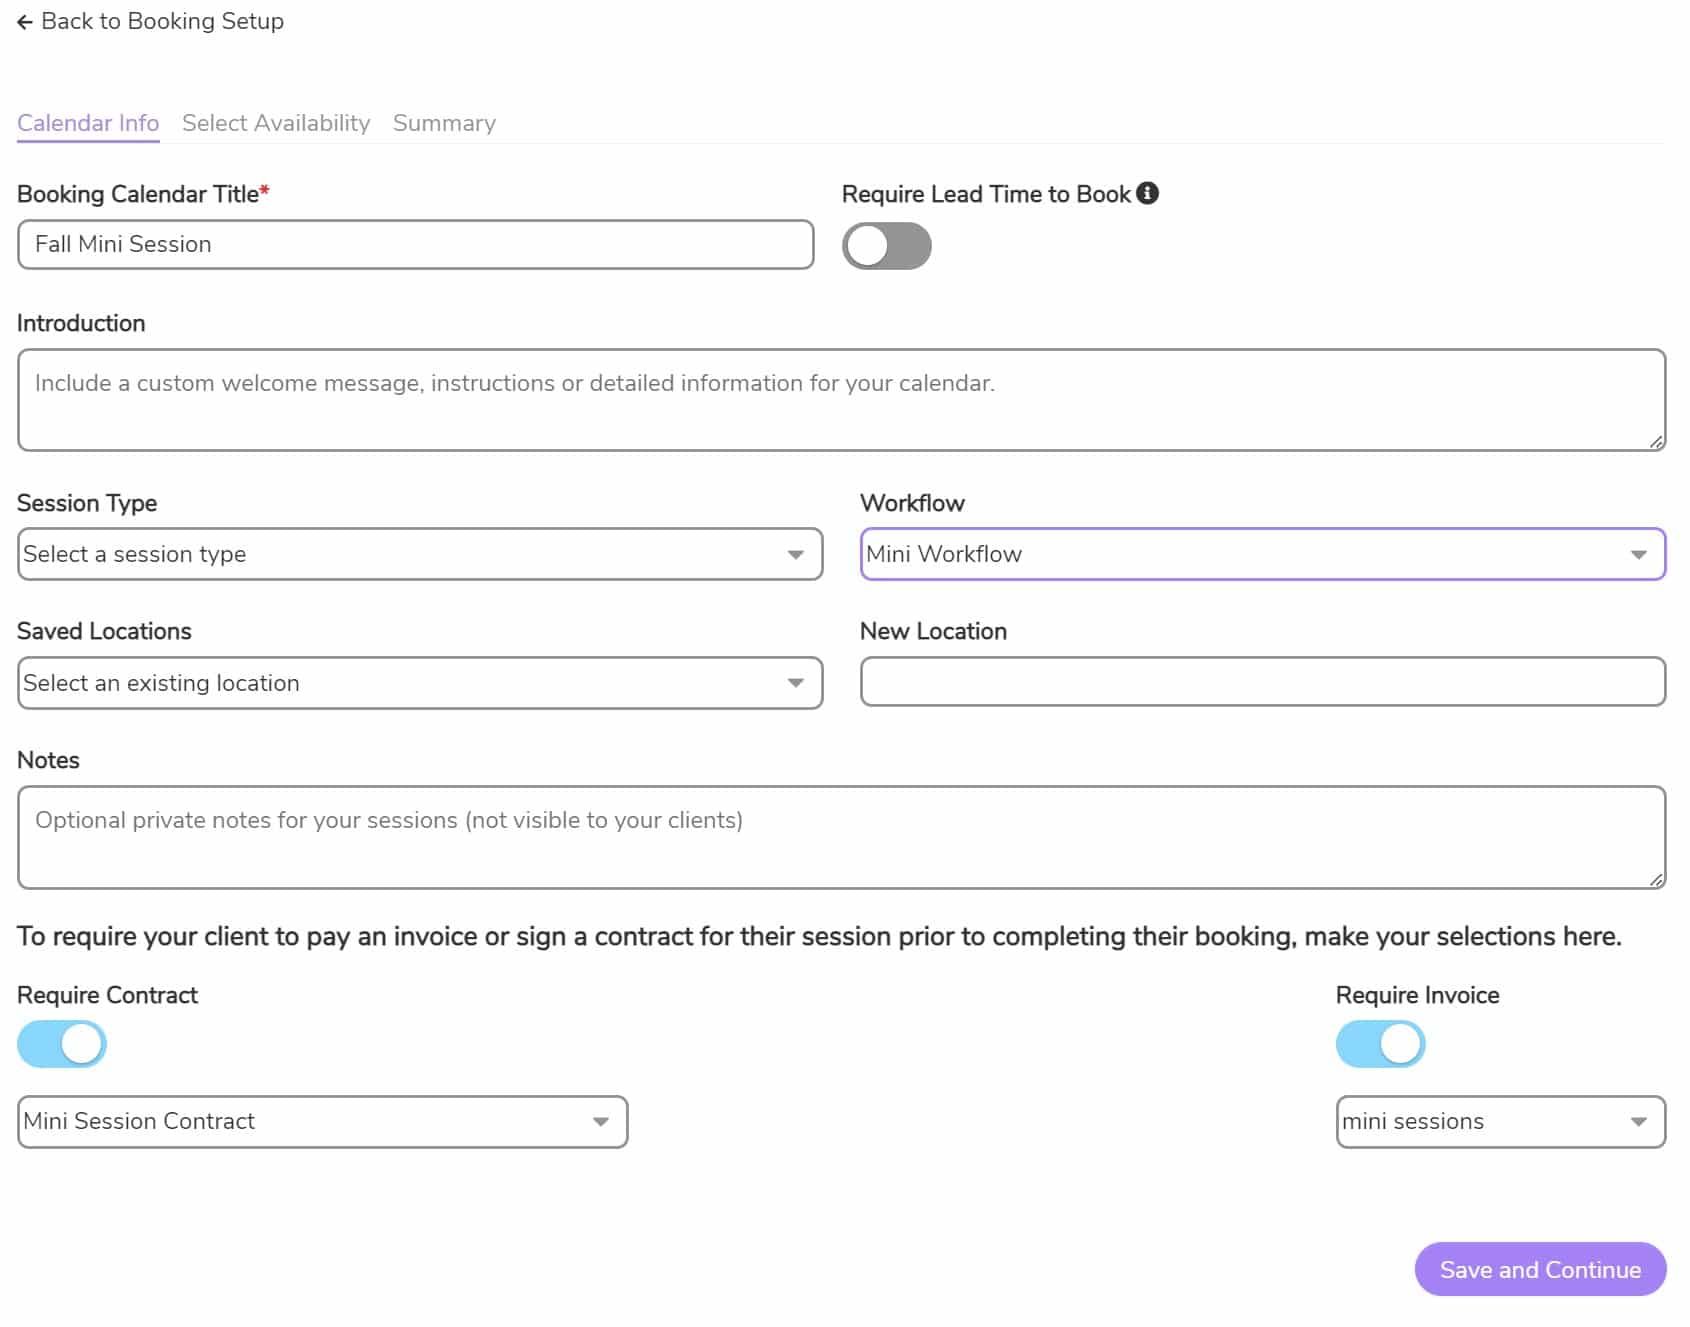
Something to Consider With Contracts and Invoices:
You’ll see on the booking calendars that you can attach a contract and/or invoice template to your booking calendar. This means that your client will complete those during the booking process in order to book a session with you. If you have these attached to your booking calendar, you’ll want to make sure leave these out of your workflow process because they are already taken care of.
If you prefer to send the contract or invoice later after they have booked, then you can consider leaving that off the booking calendar and incorporate it into your workflow process by attaching those an email template to send in your workflow.
Recent posts