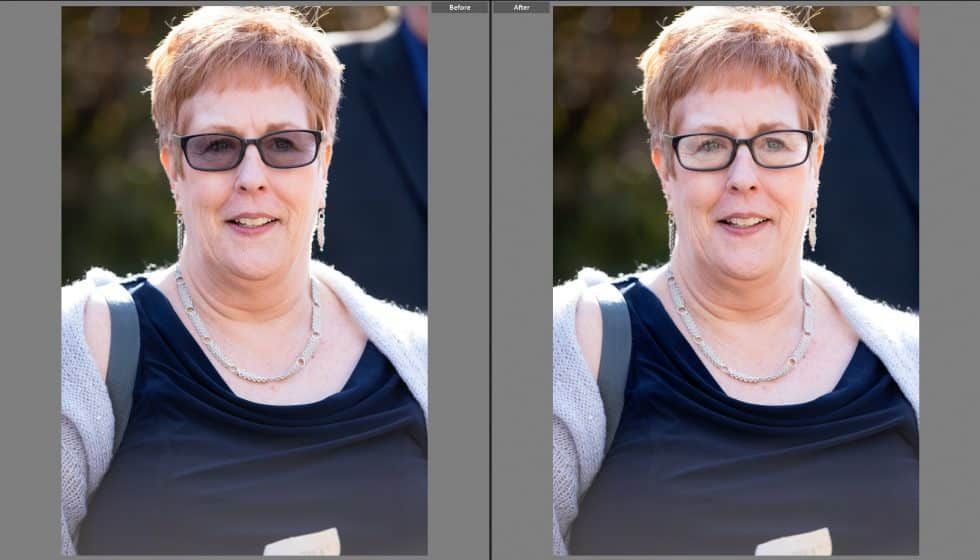
Photography Quick Tips | How to Edit Transitional Lenses in Lightroom
Get ready for this photography quick tip that will save you time on editing sessions! Do you have sessions with clients who wear transitional lens? They can definitely be a pain when you’re shooting outdoors because they darken up and you can’t see your client’s eyes. Some photographers work around this by asking their client to remove their glasses all together during the session or they take two shots – one with their glasses and one with out. Asking a client who typically wears glasses to not wear them during the session doesn’t go over well sometimes – because you’re asking them to change who they are. Doing the two shot trick works but often times you will forget about doing this or it just isn’t easy to keep up with the entire session, especially if you’re changing locations.
So what else can you do?
Edit the lenses in Lightroom!
Keep reading if you want to learn how to edit transitional lenses in Lightroom with this photography quick tip!
Lightroom Settings
Once you’ve imported your photo into Lightroom (LR), you will need to create an adjustment brush. This adjustment brush is how you’ll correct the transitional lenses. Follow these steps to create your adjustment brush.
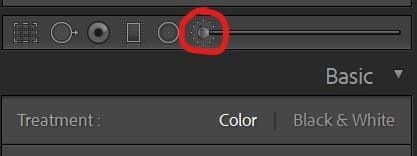
Step 1 – Select the adjustment brush
In LR – while you’re in Develop mode, you’ll see a panel on the right side of the software. You will need to select the adjustment brush to start.

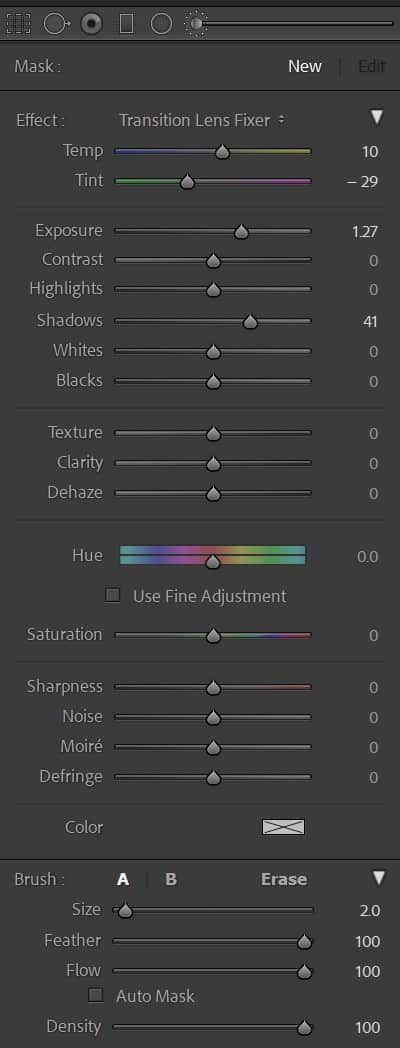
Step 2 – Enter these settings for your adjustment brush
Enter the settings you shown here. These will be the standard settings for your brush. The settings work best for images where the transitional lenses aren’t super dark (not completely blacked out). The main idea here with these settings is the temperature/tint to help keep the skin tone where it should be once you’ve brightened up the area inside the frames. Lifting the exposure and shadows is what helps get rid of the darkness and bring back some lightness to the area inside the client’s frames.

Step 3 – Save your adjustment brush as a preset
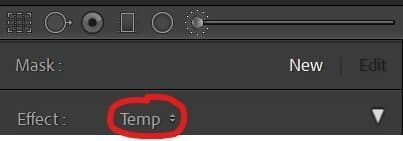
Once you have all the brush settings entered, you’ll want to save this as a preset for your adjustment brushes. This will allow you to select load the settings for the adjustment brush when you need it so you don’t have to remember these settings every time.
Just click on the drop down next to “Effect” > Select “Save Current Settings as New Preset”


Step 4 – Start Brushing!
With your newly created Transitional Lens Adjustment Brush selected, you can begin brushing onto the image. Be sure to brush only where the lenses are – avoid the frames! (if you mess up – just erase it off that area). Once you have the areas brushed, you can make any final tweaks to the adjustment brush (exposure and temp/tint) as needed. Then hit “DONE” to close the adjustment brush.

That’s it!
Now you can edit those transitional lenses in a jiff! No need to fret anymore when a client is worried about their transitional lenses affecting their photos.
What are some quick tips and tricks you love for editing?


