Online Invoicing
Every business owner knows the significance of getting paid promptly, don’t they? However, sending invoices and collecting payments through traditional methods can be time-consuming and challenging to manage. Thankfully, with Iris’ online invoicing system, the process becomes more efficient and faster, ensuring you get paid with ease.
Now, let’s dive into our comprehensive guide on getting started with invoices using Iris!
Here’s what you need to know:
Invoice Set Up
To begin, focus on adjusting your invoice settings and preferences. You can easily do this by navigating to My Settings > Settings, which can be found at the top right of the software. Once there, proceed to Invoice Set Up, and you’re ready to get started (or simply click here to take you right to the page)!
Connect to Square
In order to collect online payments, you will need to get connected with Square. Square is the payment processor that we integrate with so users can collect payments easily from their clients in a variety of ways.

Settings
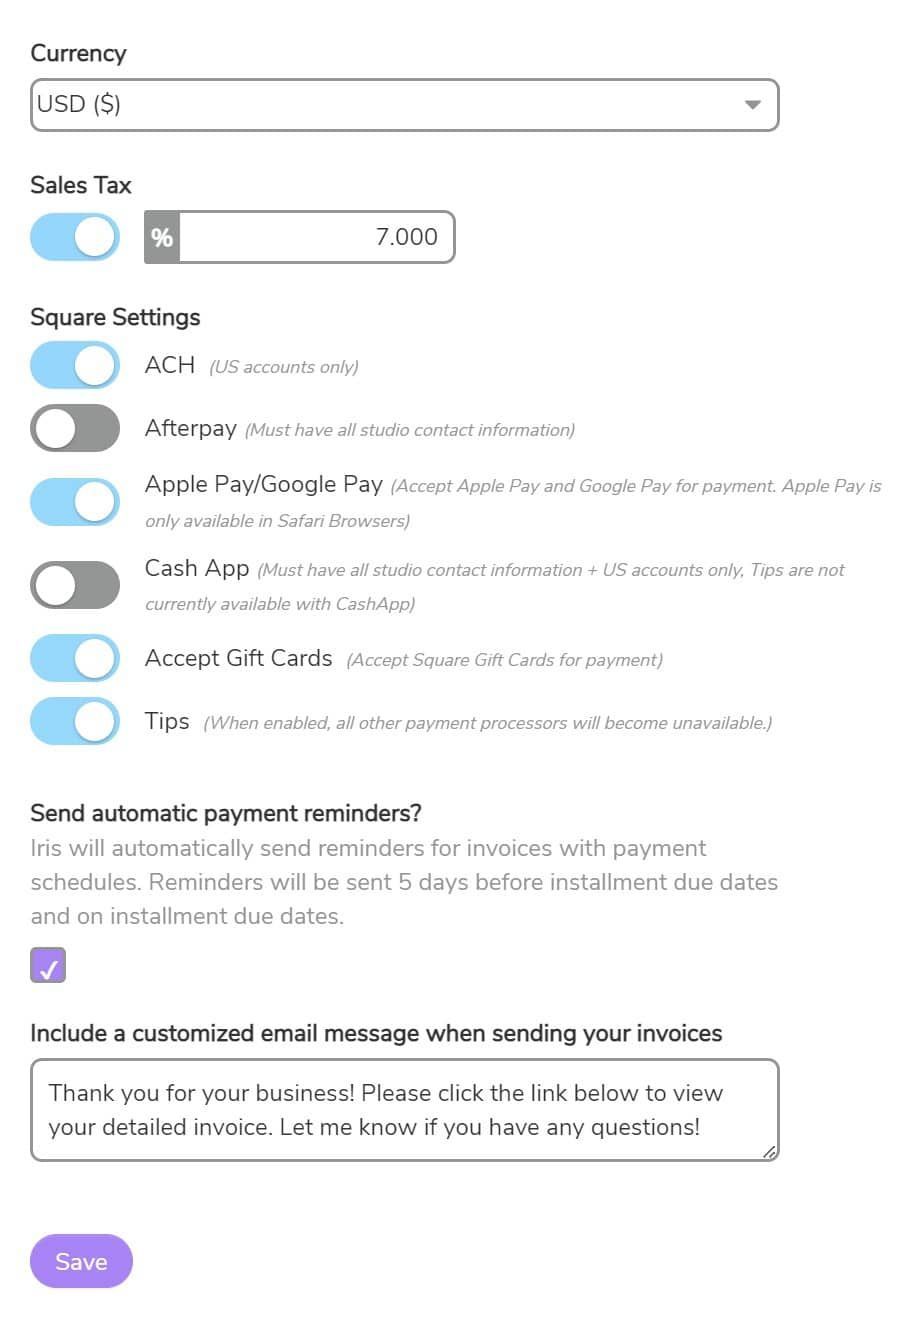
- Currency
Be sure to set your currency. We have options for USD ($), CAD ($), EUR (€), GBP (£), AUD ($), and NZD ($) .
- Sales Tax
Here you can set your default sales tax percentage. When you have this toggled on, the sales tax will automatically be applied and calculated on your invoices and invoice templates for any line items that are taxable.
- Square Settings
Our integration with Square offers a variety of additional and optional settings you can turn on at any time.
- ACH Payments – you can toggle this option on if you would like to allow your clients the ability to pay using bank transfers.
- AfterPay – this will allow your clients to make a payment using AfterPay which is a buy now, pay later service. All studio contact information must be completed in order to turn on this option.
- Apple Pay / Google Pay – this allows your clients to pay from their mobile device using Apple (available for Safari browsers only) and Google Pay.
- Cash App – Allows your clients to use their Cash App account to make a payment (Must have all studio contact information + US accounts only, Tips are not currently available with CashApp)
- Accept Gift Cards – With Square, you can set up E-Gift cards to sell and your clients can use these to make a payment on their invoice.
- Tips – you can give your clients the option to leave a tip when paying their invoice when you toggle on this option.
- Send Automatic Payment Reminders
Toggle on this option if you would like to send automatic payment reminders for your invoices that have payment schedules. These reminders are sent 5 days before an installment is due and on the day an installment is due if not paid yet.
- Include a Customized Message
You can customize the email message that is sent whenever you send a client an invoice. This message will be applied to the body of the email for all invoices sent directly from the invoice page.
Create Your Invoice Products
Next, take the initiative to include your invoice products. You can save these products in your account, making them readily available for use in invoice templates and actual invoices as line items. The range of products you can add encompasses retainers/deposits, session fees, packages, or tangible items like prints. To create a product, simply click on “Add,” and then provide essential details such as its name, description, and price. Additionally, you can indicate whether it is taxable by checking the corresponding box, which means sales tax will be applied to it. Once you have filled out the required fields, remember to save your entry by clicking the check mark icon.
Set Up Invoice Templates
To attach an invoice to your booking calendars or email templates, you must create an invoice template. These templates serve as a convenient way to have a pre-defined invoice with all necessary components, such as products, tax, and discounts already included. By using invoice templates, you can save significant time when creating your client’s invoices.
When setting up your invoice template, you’ll come across an option labeled “Days Until Due.” Entering a number in this field will automatically determine the invoice due date when it is generated from the template. For instance, if you enter “5” and create an invoice today using this template, the due date will automatically be set for 5 days from the current date.
Discounts/ Tax
In addition, you have the option to apply tax and/or a discount to your invoice template, and you can easily switch the order of these two by selecting the reverse icon located next to each section. This gives you the flexibility to apply the discount before tax or after tax.
Furthermore, you can include a payment schedule in your invoice templates, enabling you to divide the invoice into convenient installments.
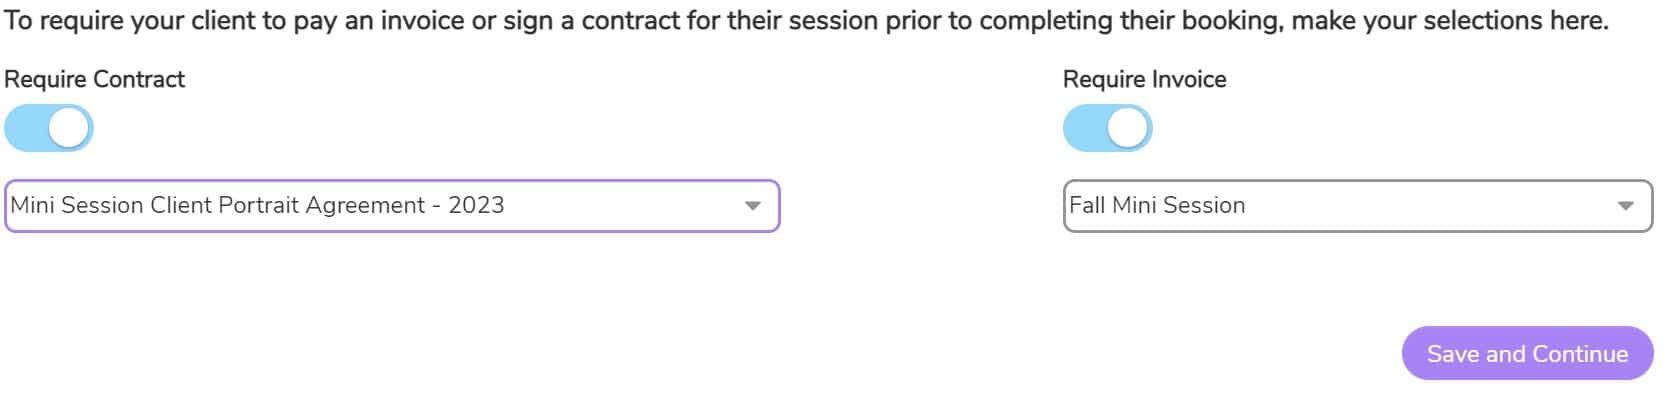
Attach an Invoice to Booking Calendars
With our booking calendars, you can easily attach an invoice template to collect payment during the booking process. This method ensures that retainers/deposits are promptly paid before adding your client’s session to the calendar, eliminating the need to chase down clients for payments.
When setting up your booking calendars, simply look for the option to require an invoice. Just toggle on this option and choose the invoice template you wish to use. It’s a straightforward process that streamlines your payment collection seamlessly.
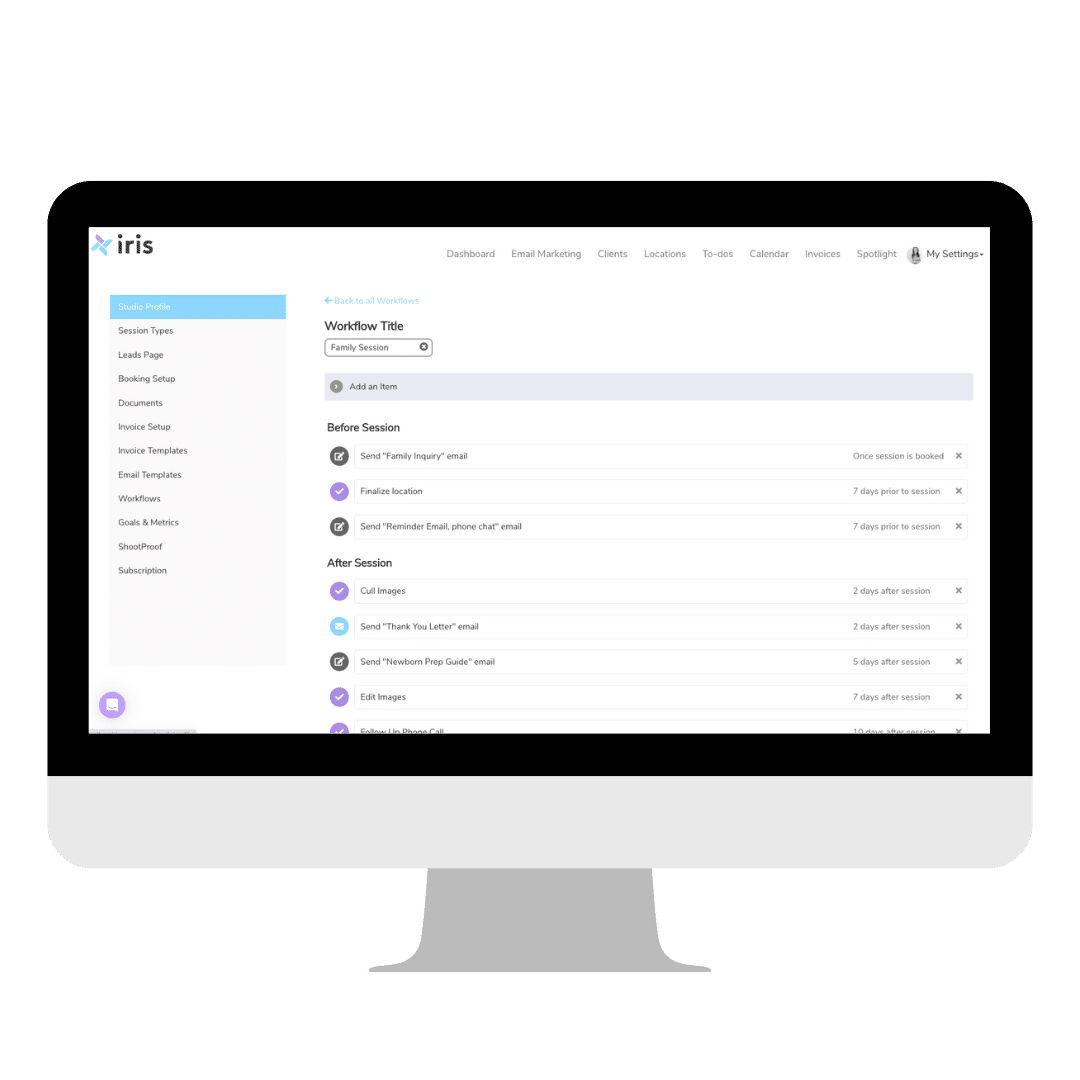
Automate Invoices with Workflows
You can attach invoice templates to your emails templates and include these in a workflow that will automate sending email with the invoice attached.
You can send the email once the session is booked, number of days before/after the session, or number of days after the session has been booked. To learn more about setting up a workflow, you can watch our Youtube tutorial.
Manually Send Invoices
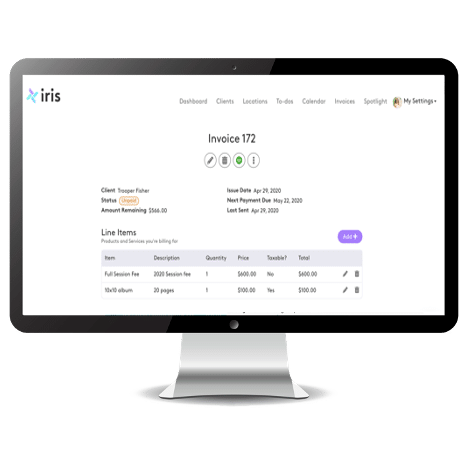
You also have the option to create and send invoices to your clients manually, which is particularly useful for customizing their invoices. To get started, head to the client’s profile and navigate to the invoices tab located on the left-hand side. From there, select “New Invoice” to initiate the process. Alternatively, you can go to “Invoices” across the top of Iris and click on “New Invoice” to create and send invoices.
A window will appear, allowing you to select the client, an invoice template (if desired), and set the issue and due dates. Additionally, you can add a memo to share any relevant notes with your client when they access the invoice. Once you’ve entered the necessary details, click on “Create Invoice.”
This is the section where you can add line items, discounts, and tax (for taxable products). If you prefer your client to pay in full upon receipt of the invoice, simply hit “send” when you are ready to send it out.
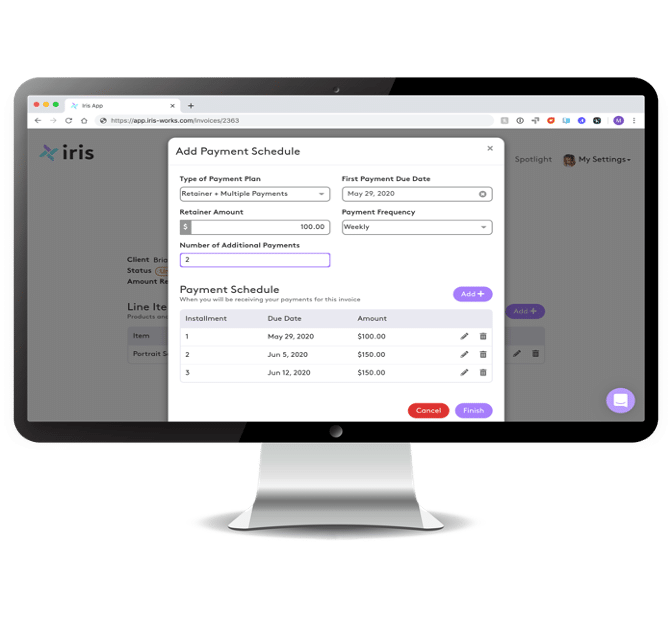
Payment Schedules
To break up your invoice into installments, follow these steps: Click on the three dots located at the top of the invoice, which will open a menu. Then, select “Add Payment Schedule.” This option allows you to create different payment plan types or even a custom payment plan. You can use the payment frequencies provided, or after the installments are generated, you can manually adjust the due dates by selecting the pencil icon to edit and then choosing a specific date on the calendar.
When you send an invoice with a payment schedule, your client will receive prompts to pay the installment that is due, and they will also be reminded about the upcoming installment(s) due (make sure your automatic reminders are turned on). This ensures a streamlined payment process for both you and your client.
Sending Quotes
When you are creating an invoice manually, you will also have the option to send it as a quote. You will just need to select the check box next to “Quote?” and it will be set up as a quote.
When you send a quote to a client, they will have the following options:
- Accept – this means they agree with the quote and it will then be converted into an invoice so they can make payment(s).
- Decline – this means they do not agree with the quote and have declined moving forward
- Requestion Modification – this allows the client to add modification notes to send back to you for review.
You will be able to see your quotes broken up into these categories on your Invoice page.
If you need help figuring out how to get your online invoicing started in your account, you can schedule a 1:1 call with us and we’ll assist you!
Recent posts